Prelab | Setting Up Your Programming Environment
Hey there, freshmen! Introductory Programming is your first major course at the college. It’s all about getting you up to speed with computer science basics, programming concepts, and software development processes using C language. To make the most of this course, we recommend setting up your C development environment on your computer before lectures and lab sessions. This guide will help you do just that.
Table of Contents
1. Programming Environment Overview
Generally, a C language programming environment consists of a C compiler and an editor.
Compiler
A compiler is software that turns your code into binary files that computers can run.
Think of it like this: You’re trying to chat with a friend who only speaks Chinese, but you only speak English. You need a translator to help you communicate. In this analogy:
- Your English → The code you write (high-level programming language)
- Translator → Compiler
- Chinese → Binary instructions the computer understands
Just like a translator converts your English into Chinese that your friend can understand, a compiler converts your code into instructions the computer can understand and execute.
For this course, we recommend these compilers:
- Windows: MinGW-gcc
- macOS: clang
- GNU/Linux: gcc/clang
Editor
An editor is software for editing text (we’re mainly talking about text editors here). Unlike compilers, editors are something you’ve probably used before when working on a computer. Microsoft Word, WPS, or the Notepad on Windows are all examples of editors. In programming, we use editors to help edit code text files.
So, can we use Notepad or even Word to write code? Absolutely! Check out this video.
To boost development efficiency, we usually use code editors for programming.
Common code editors include:
- Visual Studio Code (recommended)
- Jetbrains Fleet
- Notepad++
- Vim/NeoVim
- Emacs
Code editors offer features like syntax highlighting, auto-completion, and real-time error detection to help you code more efficiently.
For this course, we strictly require using Visual Studio Code (note: this is different from Visual Studio).
* Integrated Development Environment (IDE)
You might have come across the term IDE in other programming books or tutorials. An Integrated Development Environment is software that bundles all the tools you need for program development (editor + compiler + other stuff) into one package. It usually doesn’t need extra setup and is “ready to use out of the box”.
Common C language IDEs include:
- Visual Studio
- Codeblock
- Jetbrains Clion
- Dev-C++
Please don’t use IDE for any lab session assessment of this course.
For beginners, it’s better to start with a simple editor and gradually move to an IDE. For lightweight development in labs, an editor is faster and more flexible.
The following sections will guide you through setting up your own development environment by installing a compiler and an editor separately. Please choose the appropriate section based on your operating system. Before we start, please click this link to get the installation package from Feishu drive, in case you can’t download it normally due to network issues. The origin download link can be found here for MinGW gcc compiler (Windows user), VS Code (choose the version that fits your operating system).
2. Windows 10/11
I’ll be using Windows 11 to demonstrate how to set up the development environment on Windows. The core logic and operations also apply to Windows 10, with only slight differences in some operations. If you find that an operation doesn’t work on your Windows system, please search online for a solution using the keywords How to xxx on Windows X.
Setting up the C language compiler
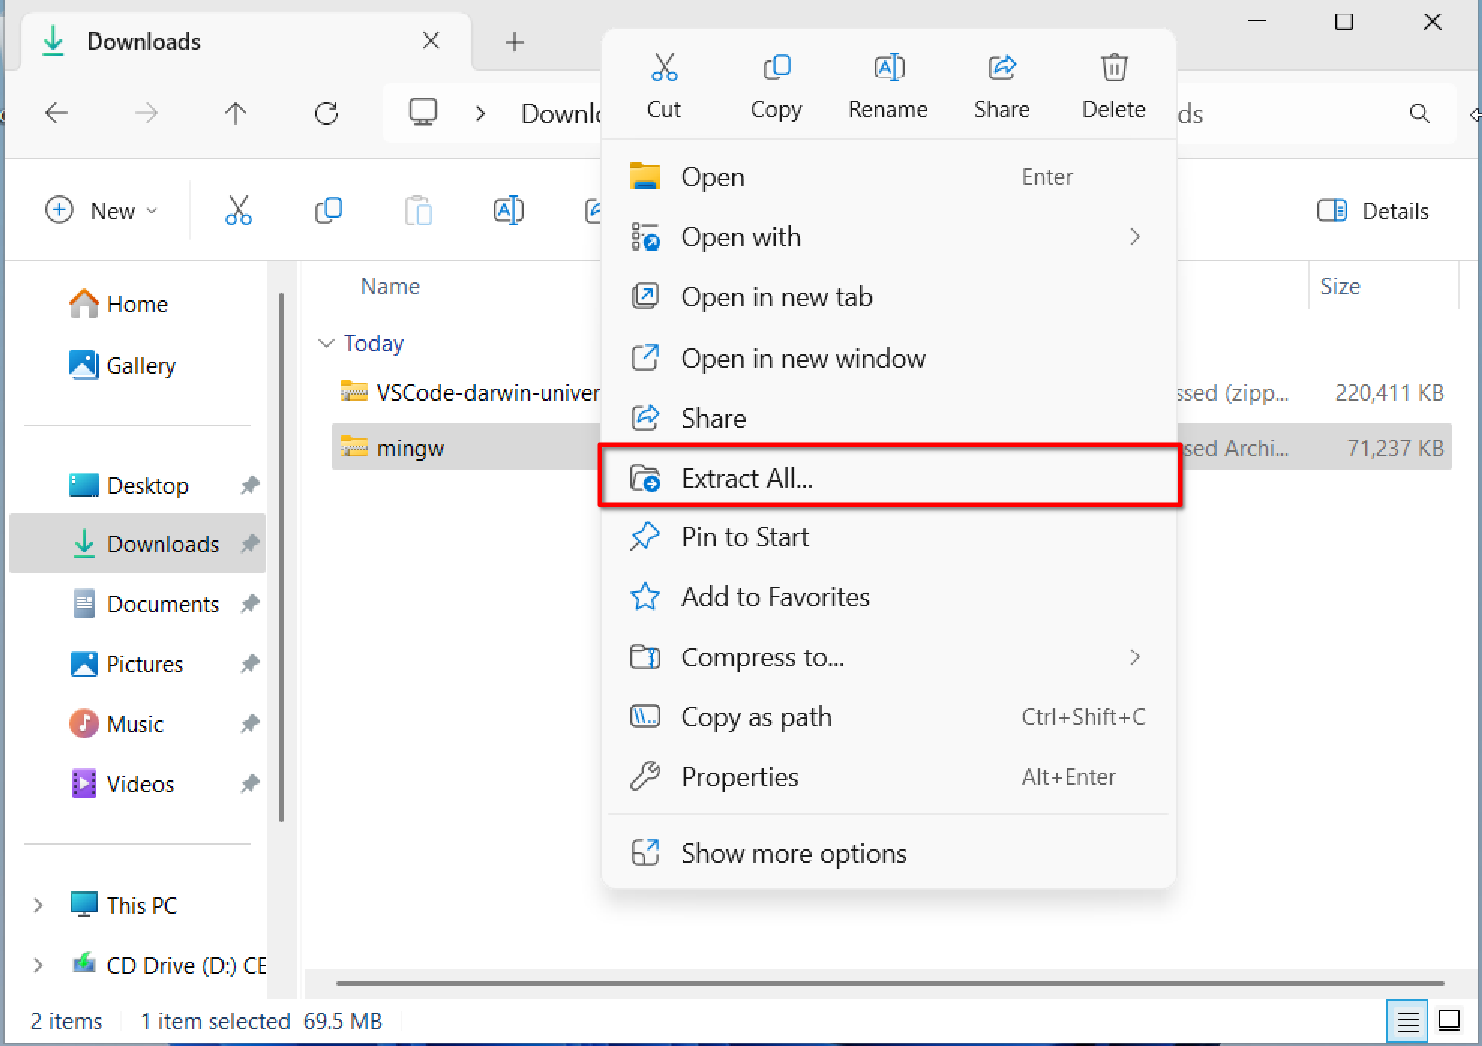
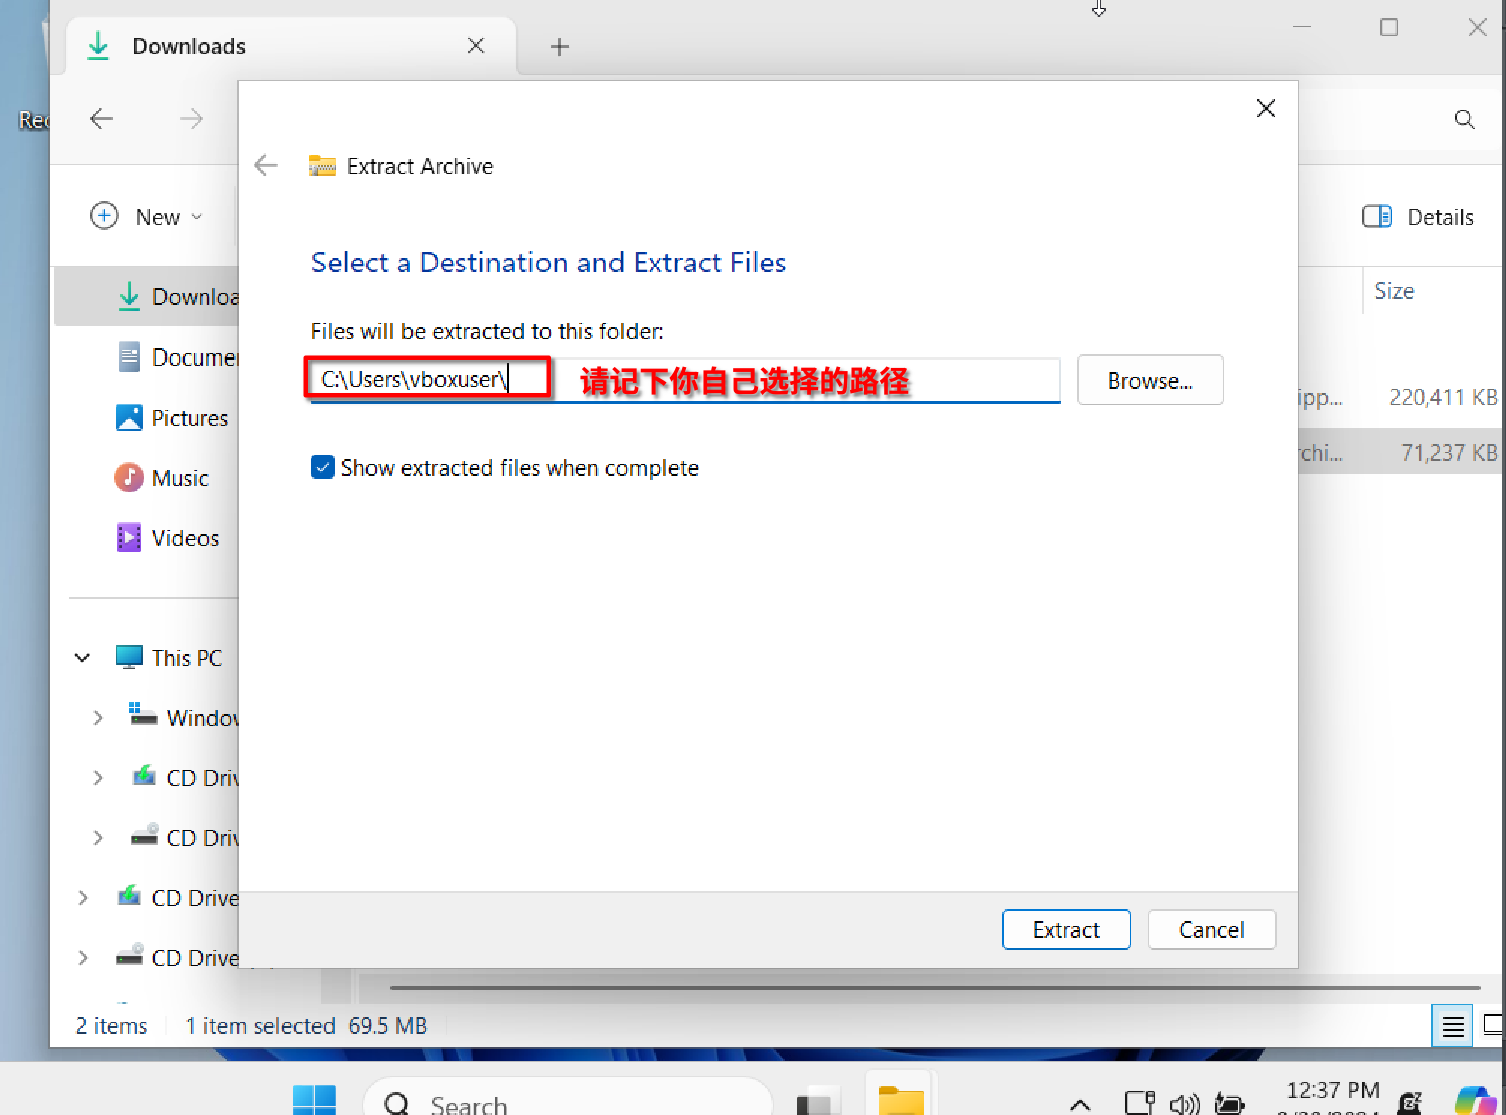
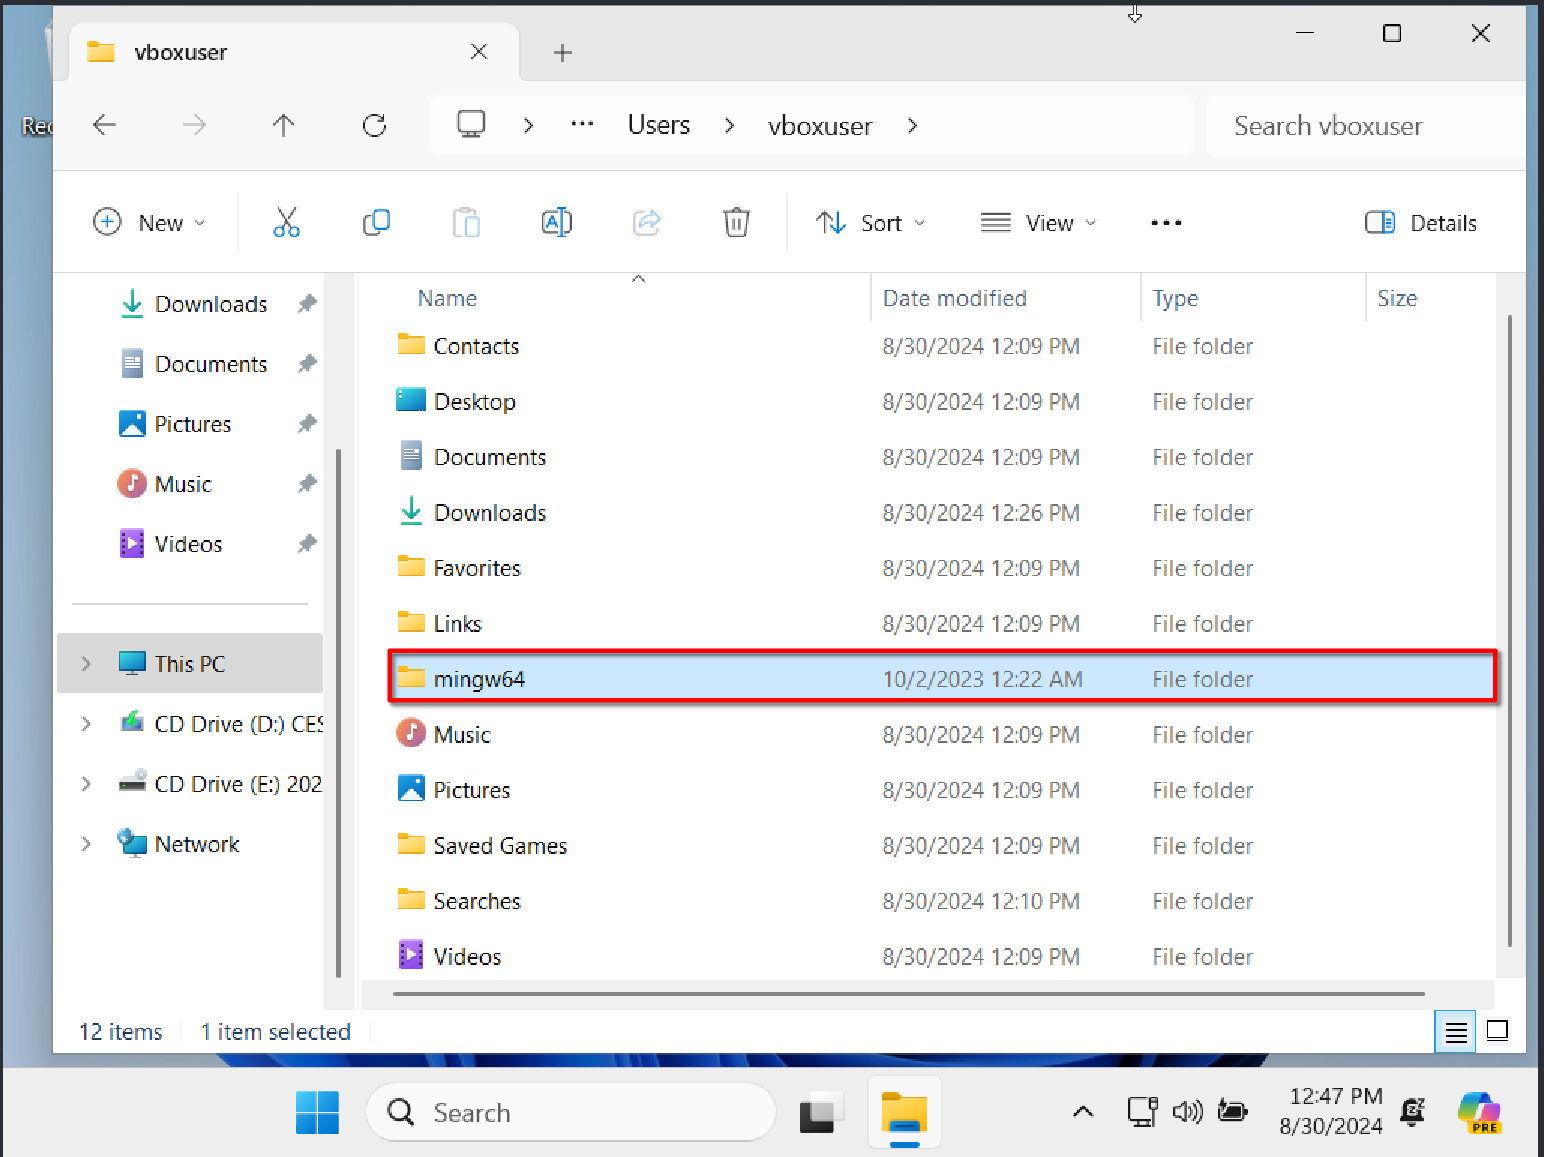
In the package, please download the file mingw.7z, and choose to right-click and extract it to your desired path (don’t just double-click to open it). Here, I chose a location under the C drive; note that you don’t need to extract it to the C drive, any path is fine, but make sure this path doesn’t include Chinese characters or spaces. For the sake of consistency in this tutorial, I’ll use $PATH$ to refer to the extraction path. After extraction, you’ll see a new folder called mingw64 in your $PATH$ directory.
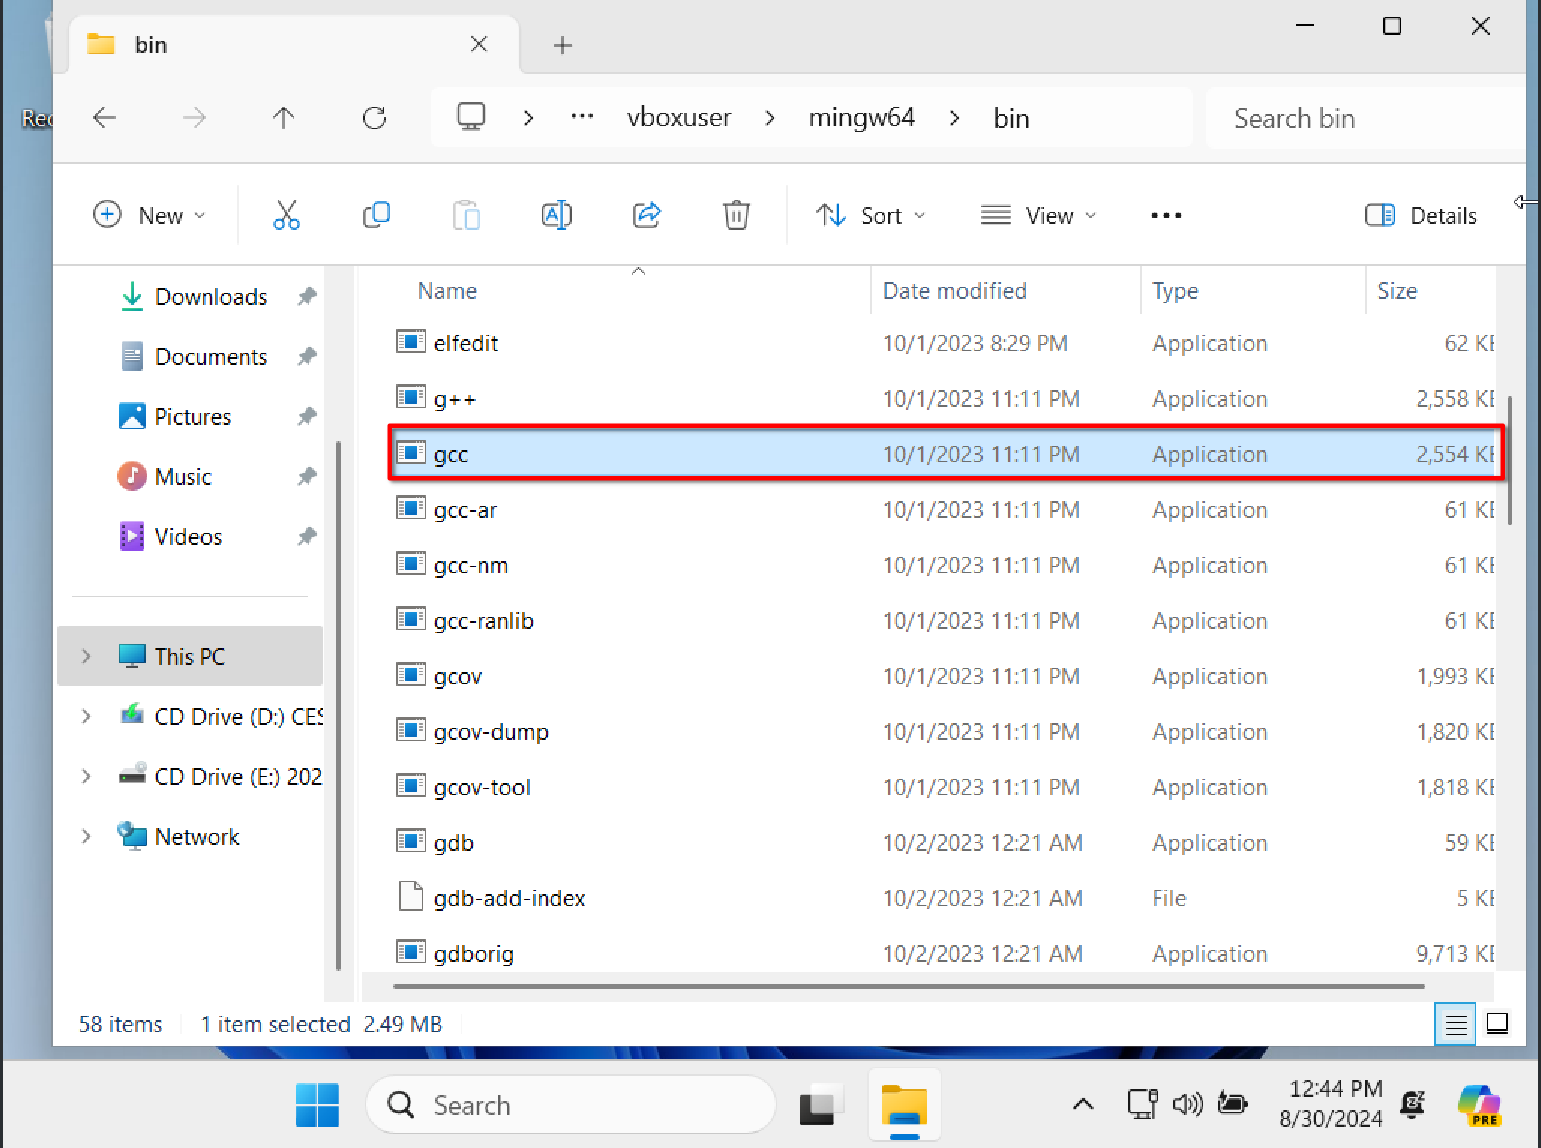
After this step, we now have the C language compiler gcc in our system, located at $PATH$\mingw64\bin\gcc.
Next, we need to make sure your operating system and other software (like VS Code, which we’ll install later) can automatically find the compiler’s location. We do this by configuring environment variables.
What are environment variables?
I’ll leave this question for you to find the answer online.
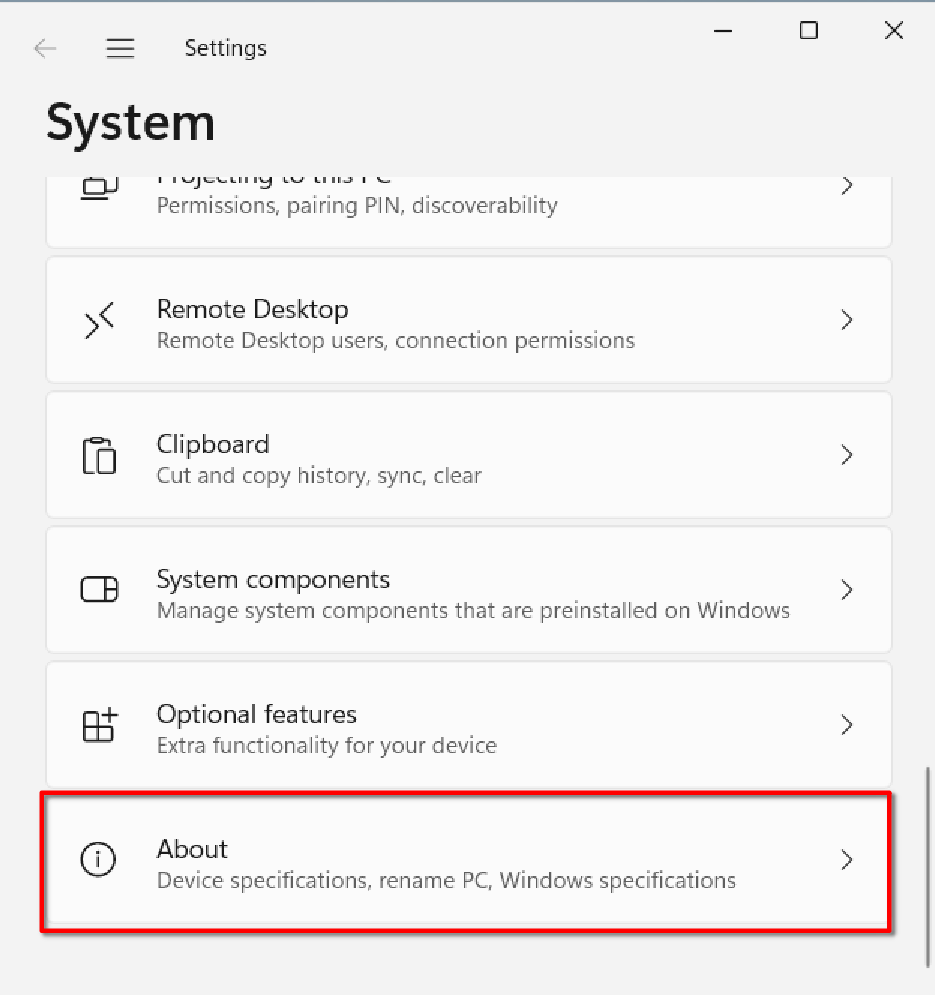
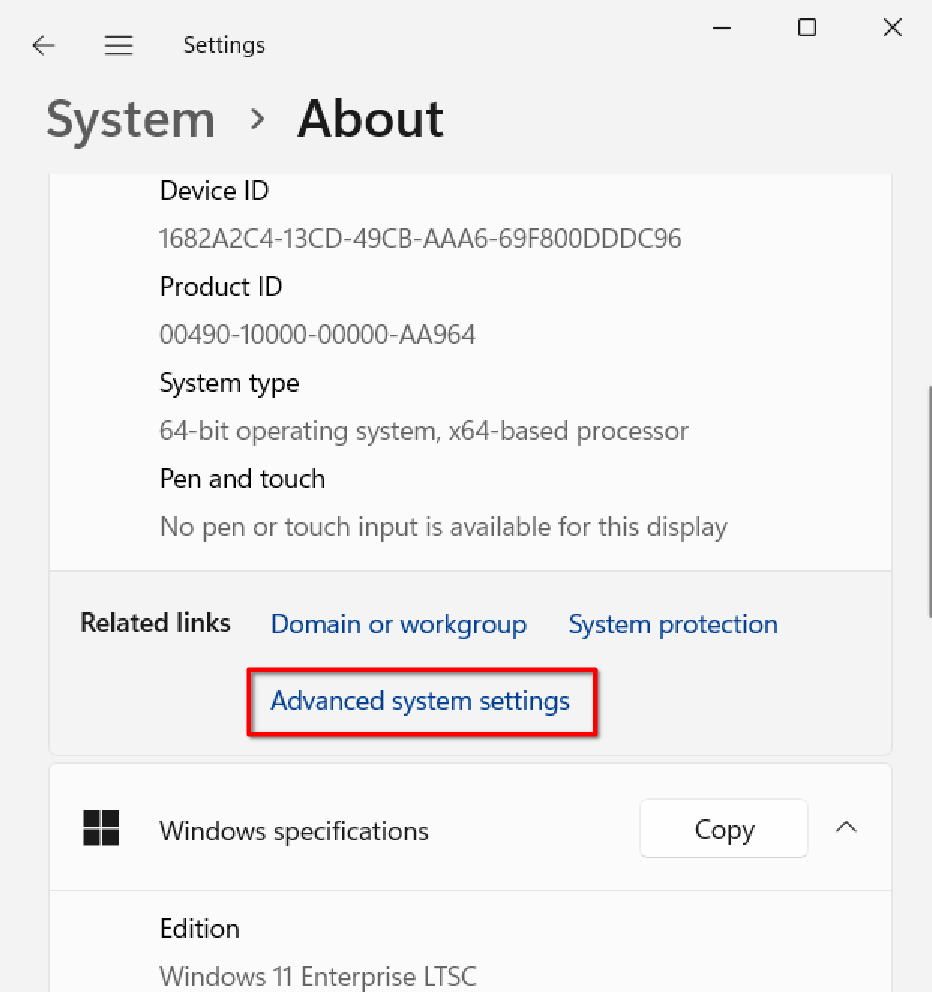
Open Settings, select System settings -> About, choose Advanced system settings
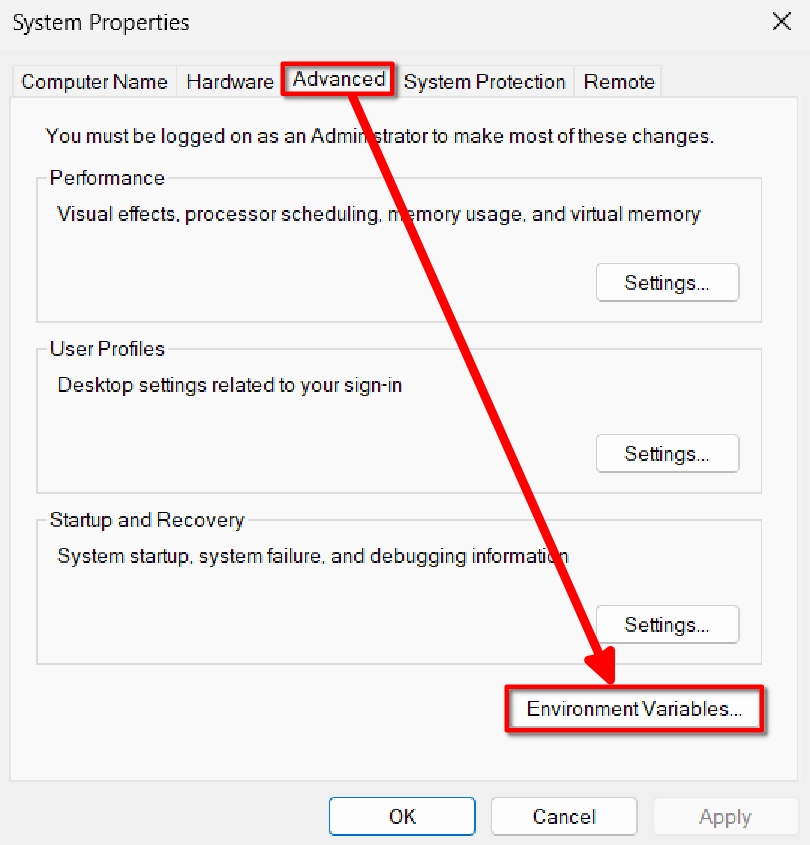
In the new window, make sure you’re in the Advanced tab, select Environment Variables
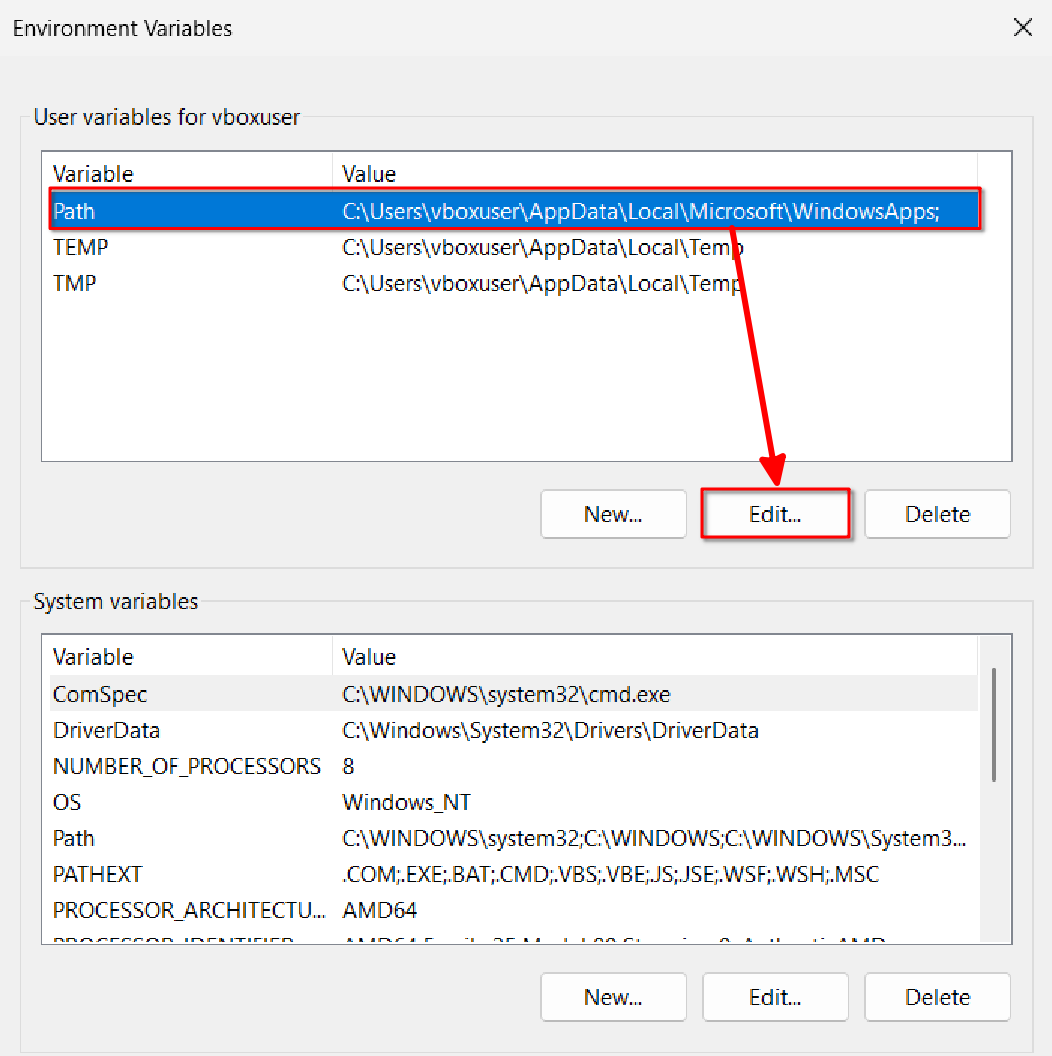
In the new window, double-click the Path row under Variables (or select Path and click Edit below)
In the new window, select New on the right, and in the new blue item’s input box, type the following: $PATH$\mingw64\bin,
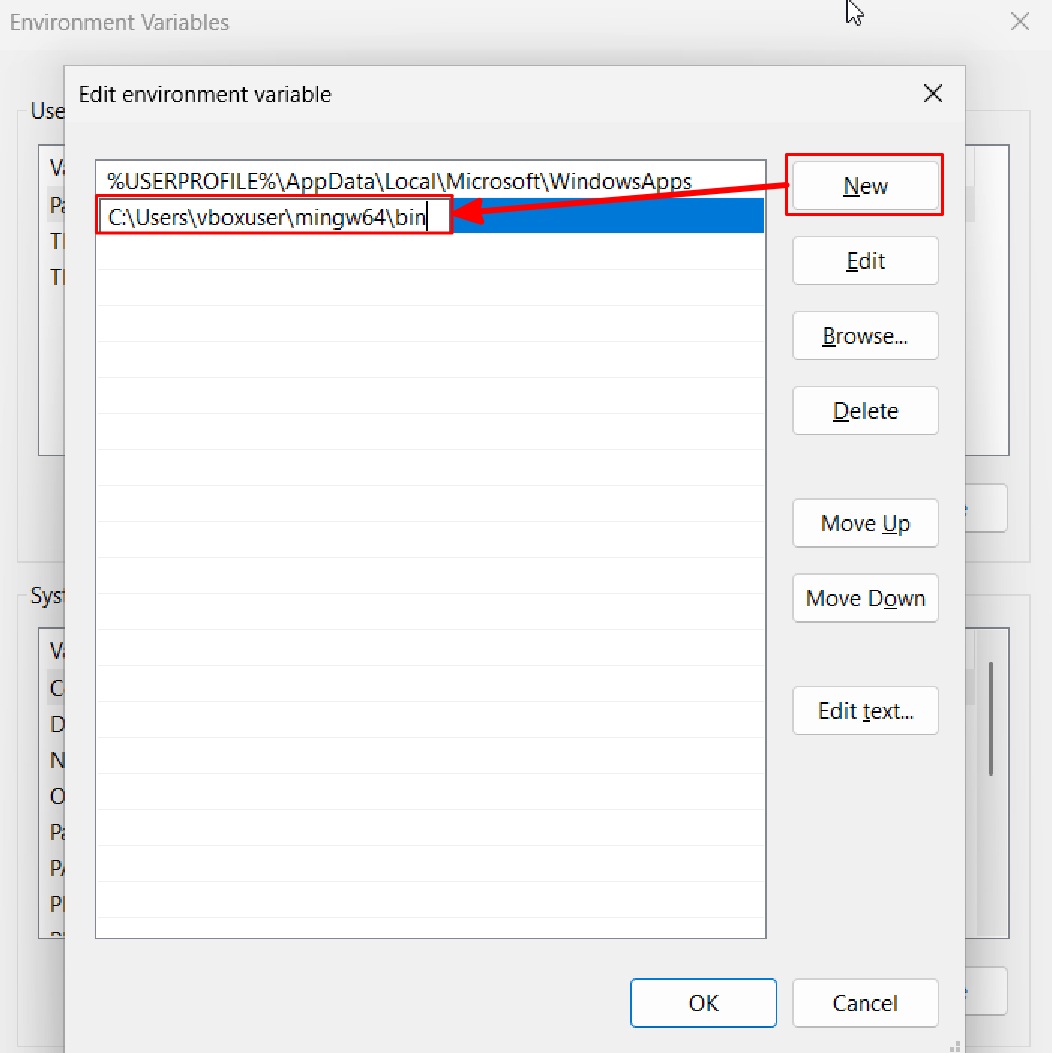
Please note:
- Replace
$PATH$with your own extraction path. - If your path contains spaces or Chinese characters (like in your username), it might cause the subsequent configuration to fail.
- After adding, click OK at the bottom to exit this window, then click OK again to exit the next window. Forgetting to click OK will result in the addition failing.
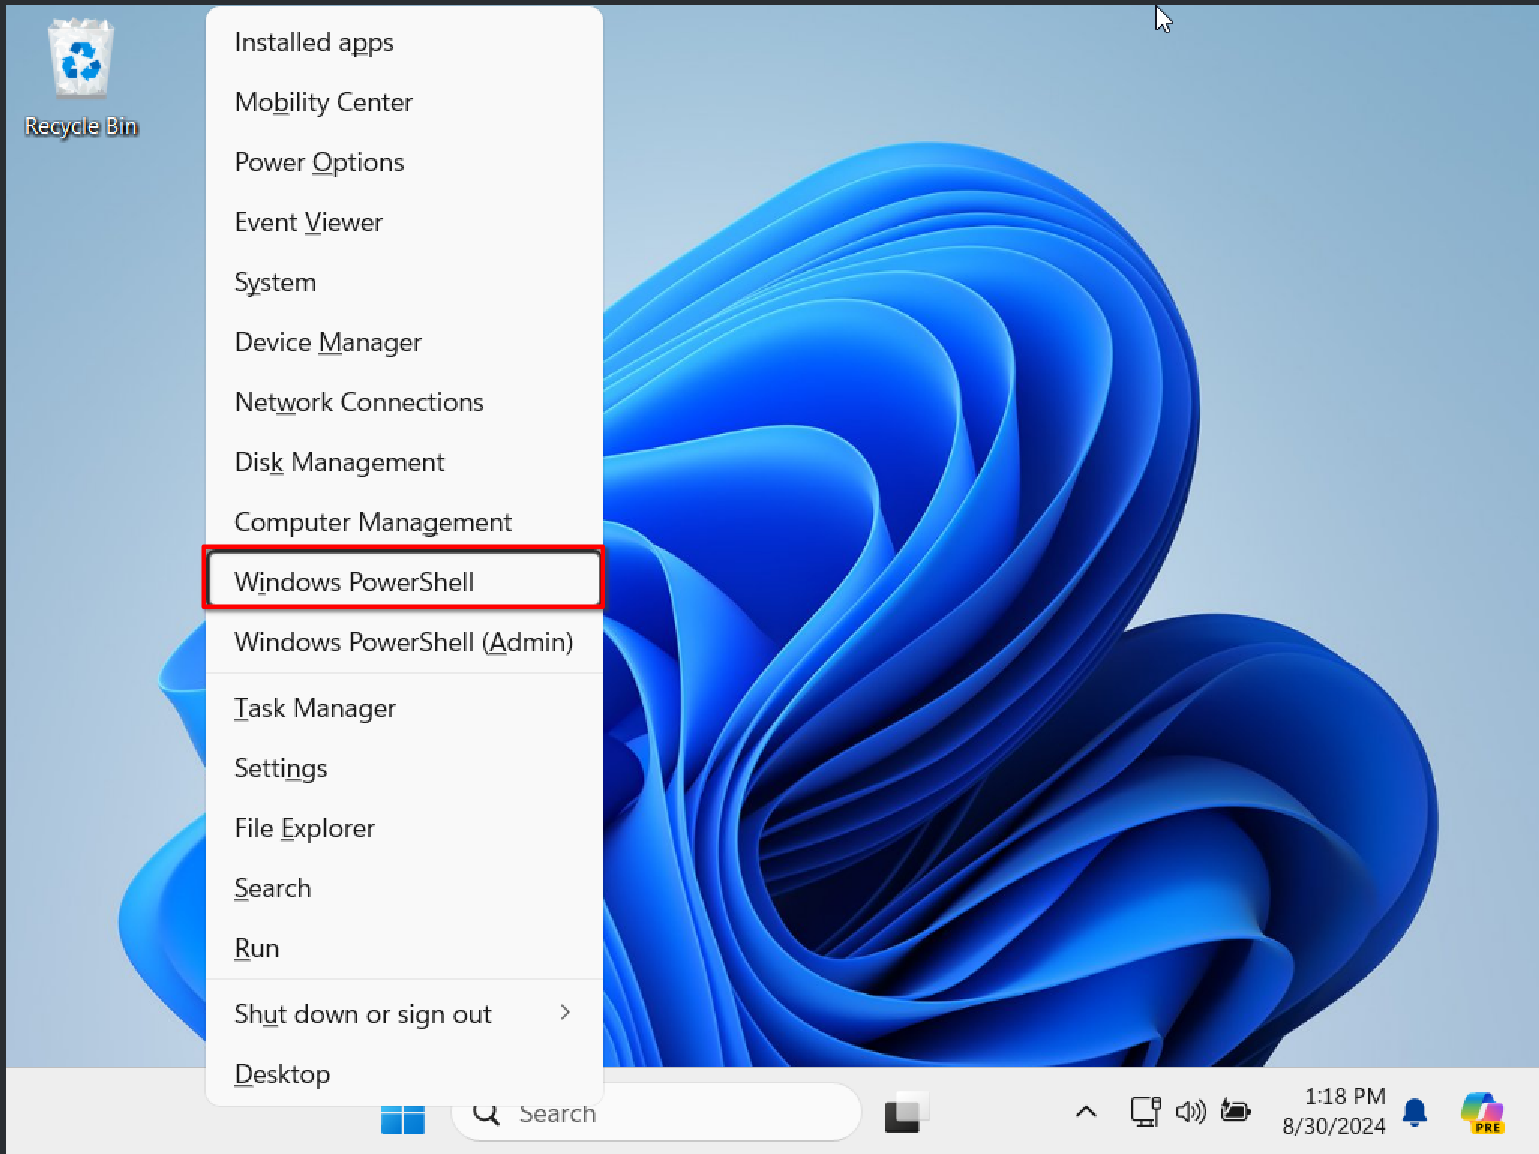
At this point, the compiler configuration is complete. We can verify if the configuration was successful with the following steps. On the desktop, press Win+X, and in the pop-up menu, select Windows PowerShell (or you can directly search for PowerShell in the search bar and click to enter)
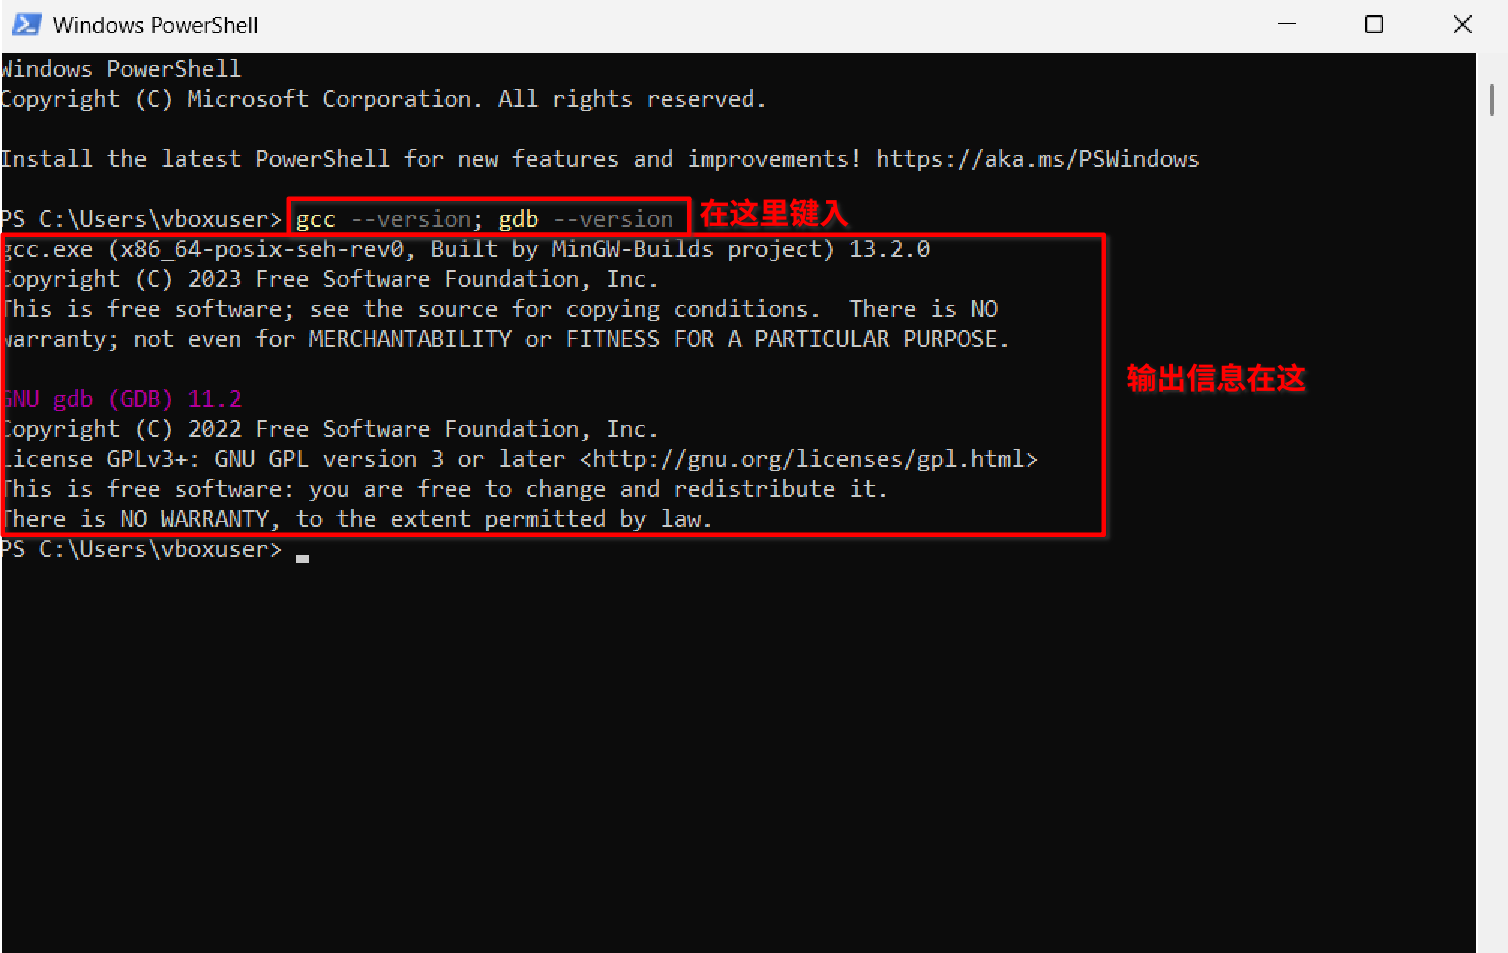
In the black window that pops up, type the following: gcc --version; gdb --version. Pay attention to case, spaces, and use English half-width semicolons. It’s best to copy and paste this.
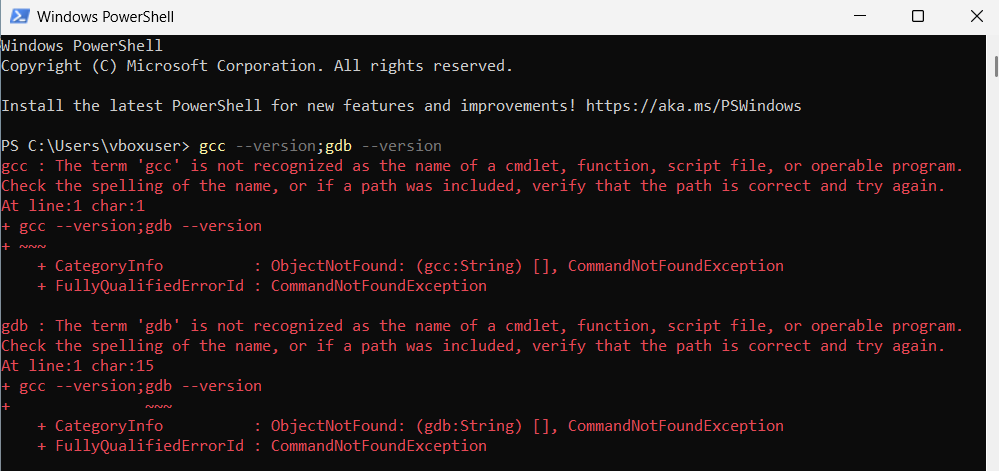
If the configuration failed, the output will be some red error messages; please reread the above tutorial and seek help if needed.
Installing VS Code
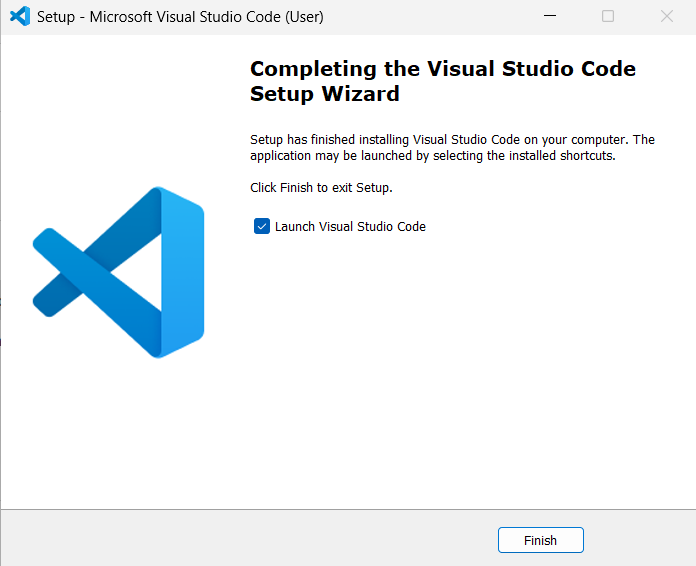
Download the VS Code installer from the package, VSCodeUserSetup.exe; double-click the downloaded installer and follow the prompts to install. Here you can choose your preferred installation configuration, such as installation path (it’s still best to avoid Chinese characters/spaces), whether to add shortcuts, etc. If you have any questions, please search online for related keywords. The interface after installation looks like this:
3. Mac OS
Setting up the C language compiler
Setting up the compiler on Mac OS is very simple.
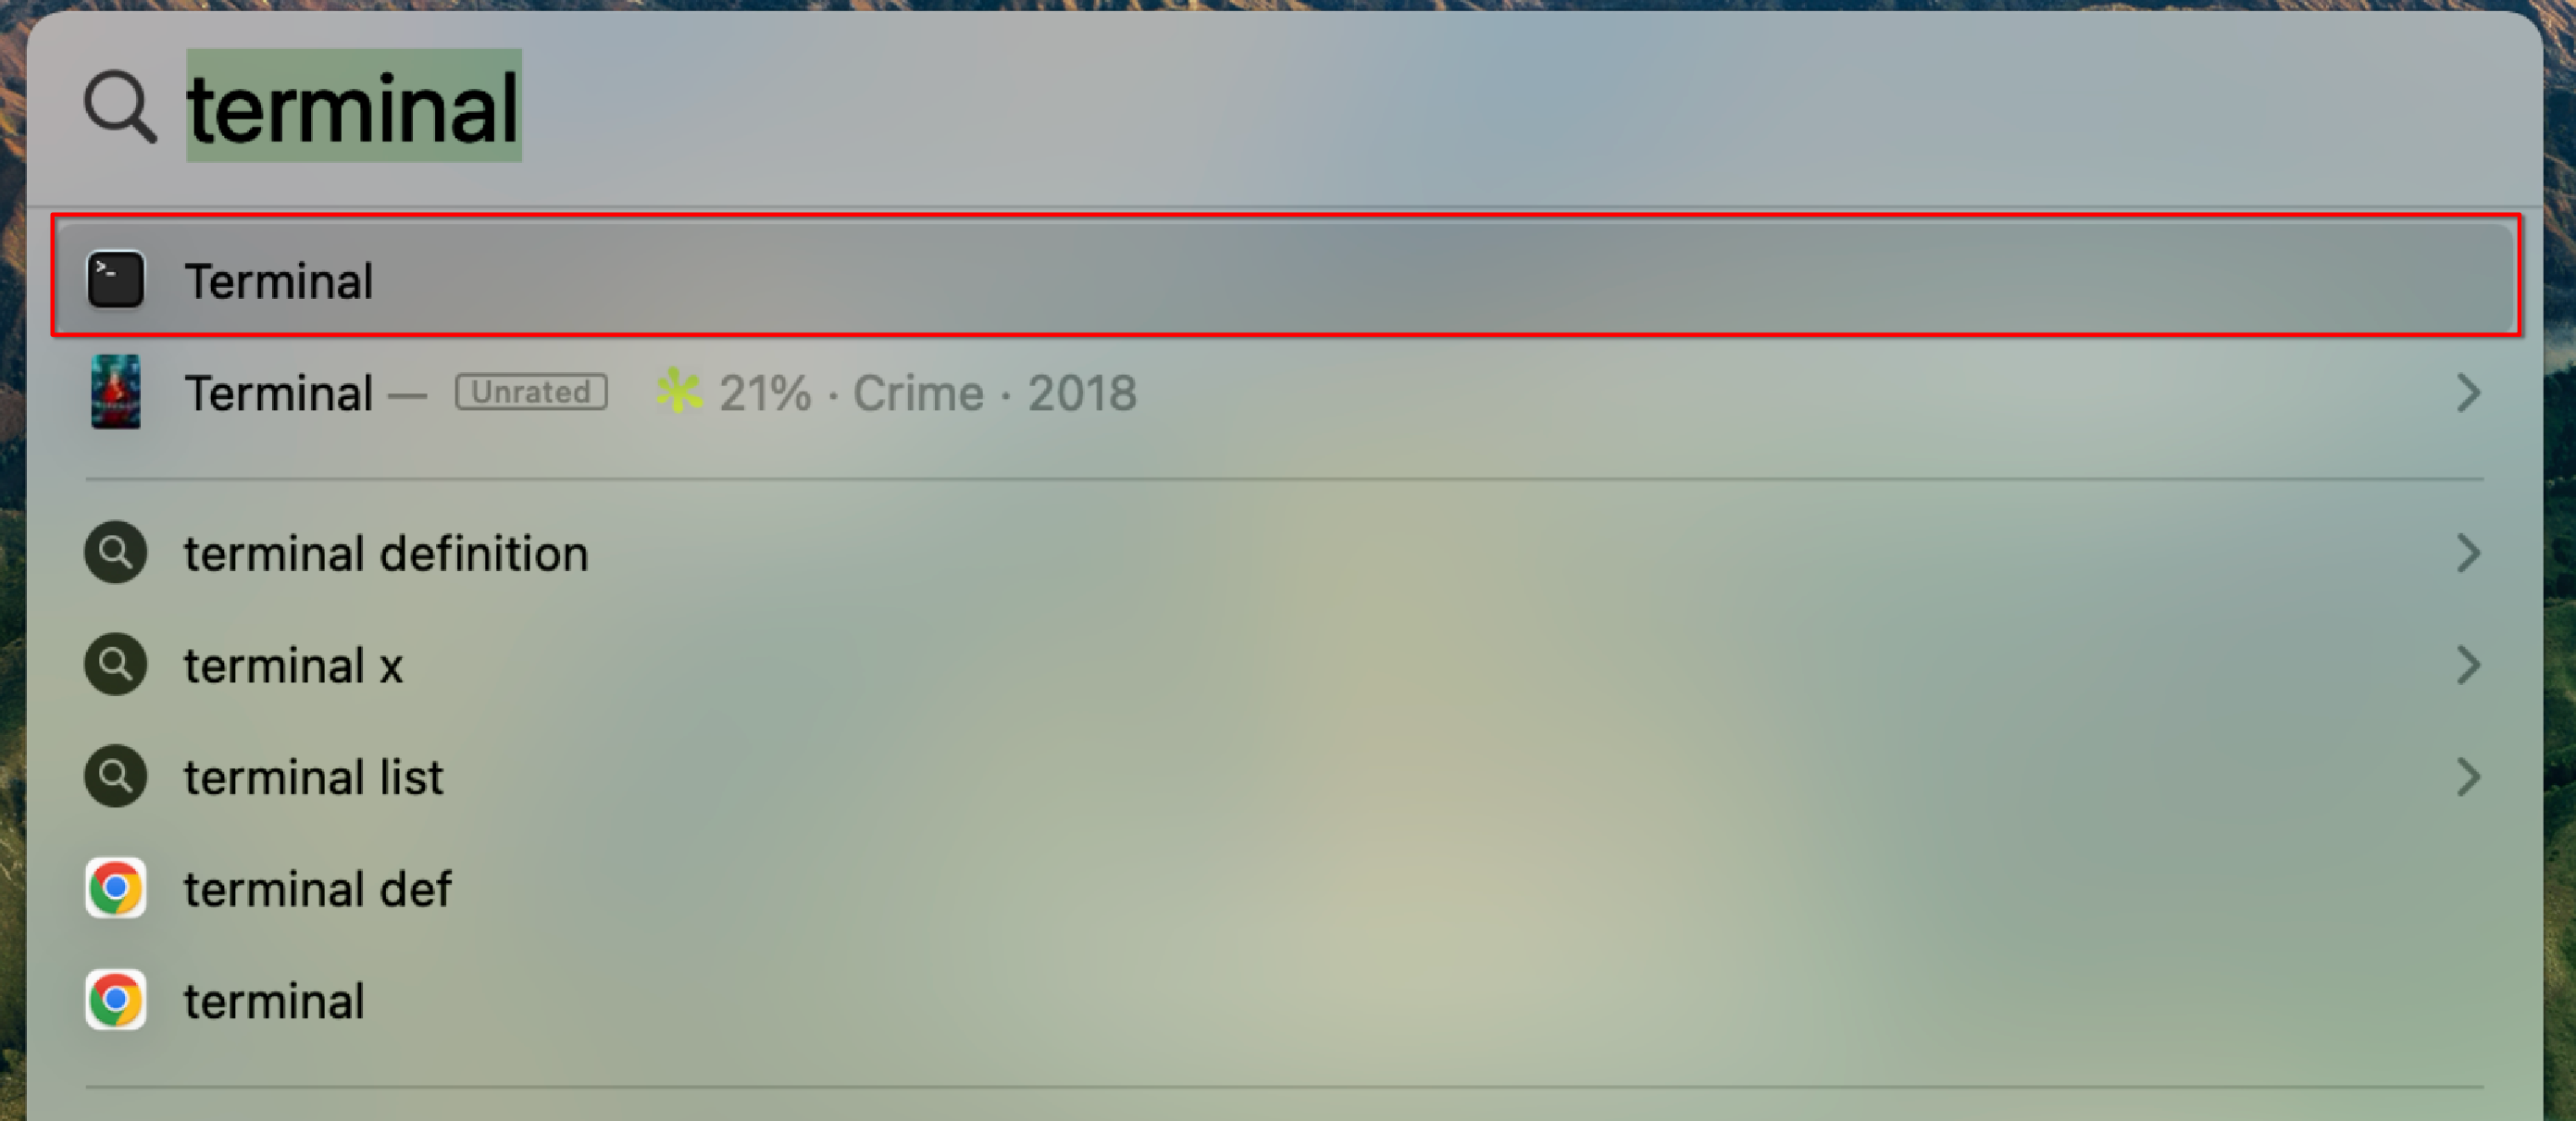
On the desktop, press Command+Space, type Terminal in the search box, and select the Terminal application.
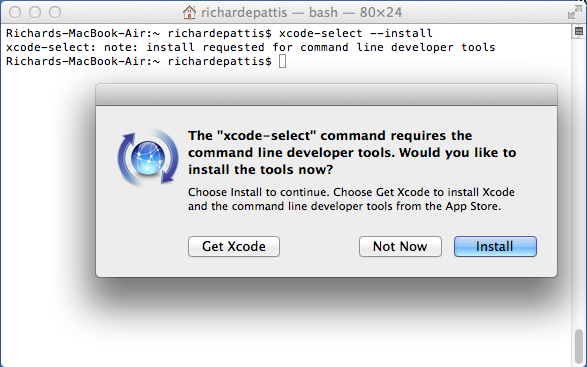
In the terminal window, type xcode-select --install, pay attention to case and half-width characters, it’s best to copy the command directly. Since I’ve already installed it, I’m using someone else’s screenshot.
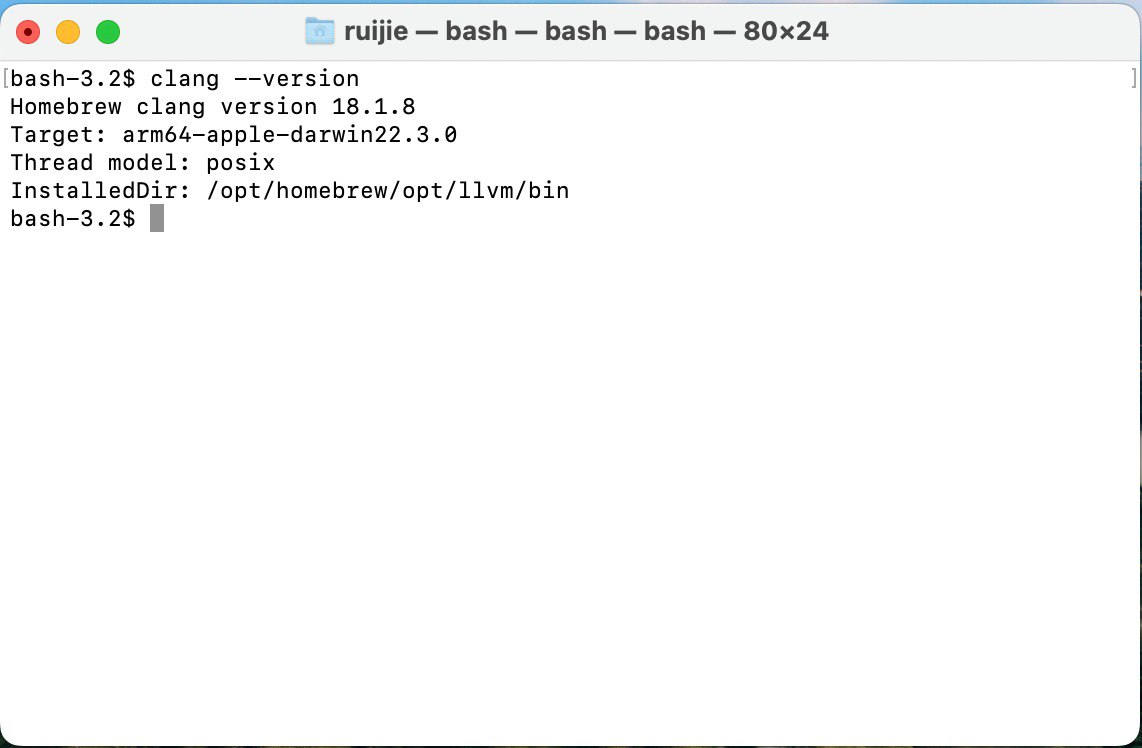
In the pop-up window, continuously select to confirm installation; after installation, type clang --version in the Terminal window, the output should be as follows (the text might have slight differences):
Installing VS Code
Download VSCode.zip from the package, after downloading, simply copy the extracted Visual Studio Code application directly to the Applications tab in Finder to complete the installation.
4. VS Code Configuration
The following content references Microsoft VS Code’s official tutorial, it’s highly recommended that you read the original website. Next, I’ll use the VS Code I installed earlier on Windows 11 to show you how to configure and write your first C language program. This process is also applicable to Mac OS. If you encounter any differences that you can’t understand or resolve, please search online or seek help.
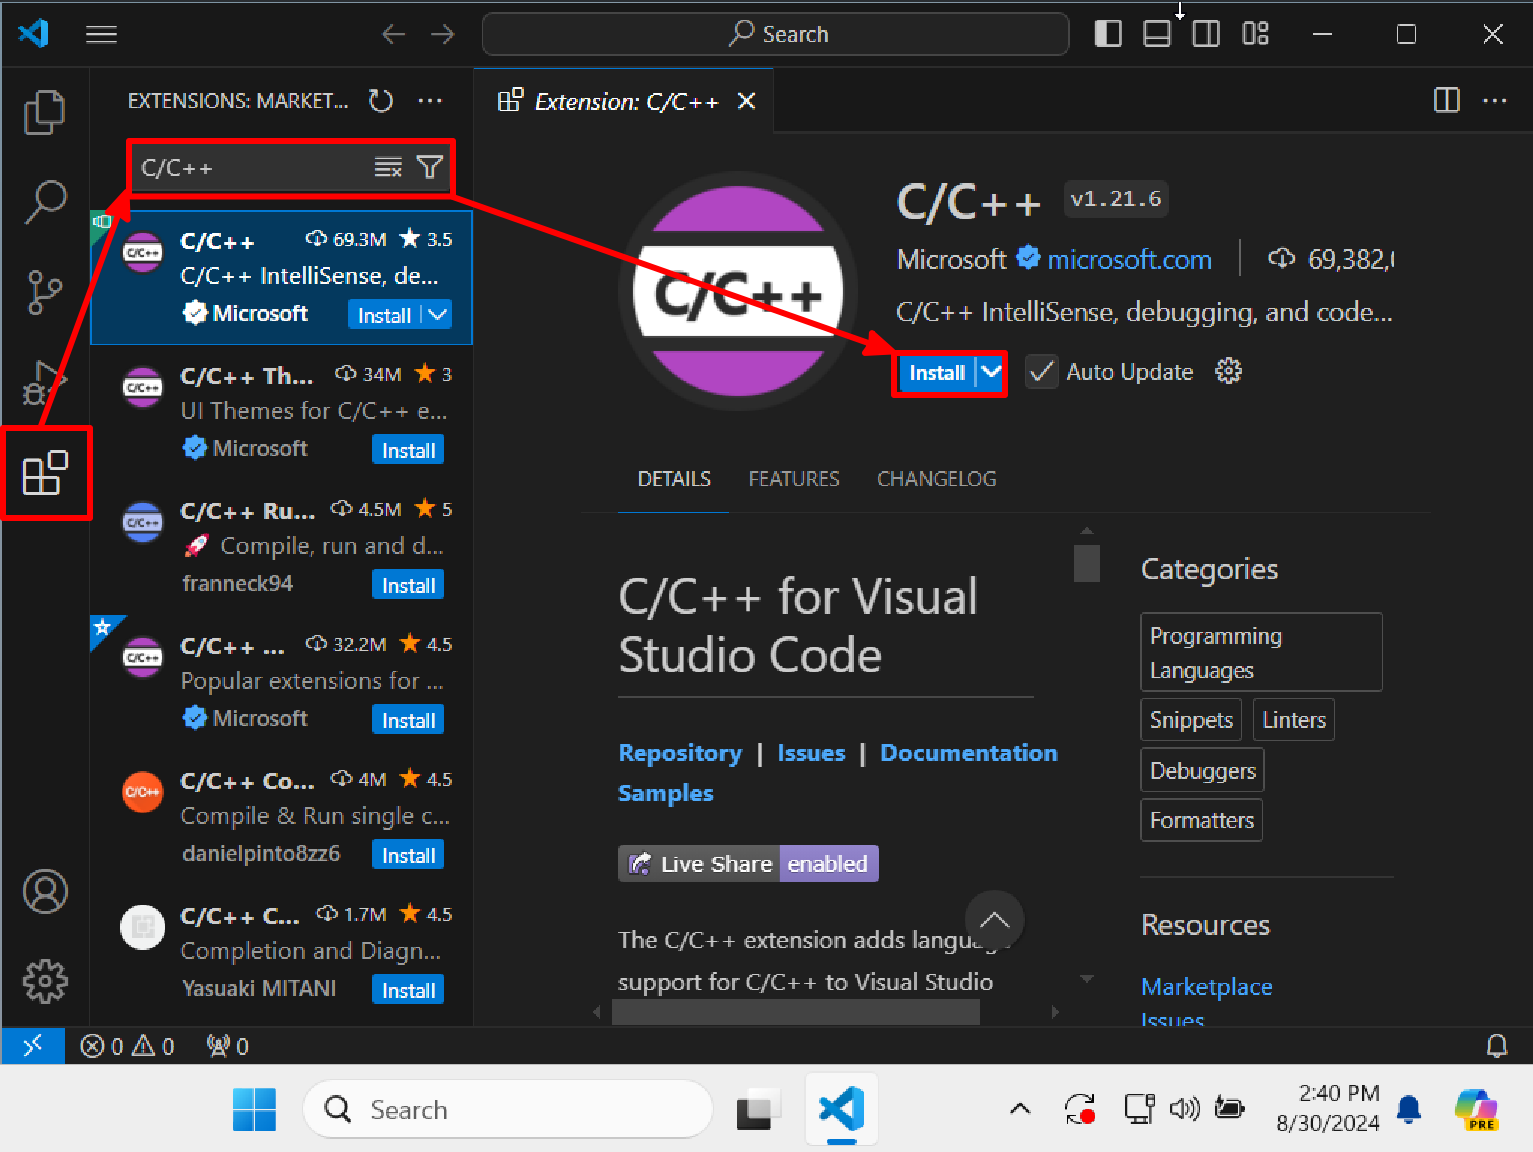
On the VS Code homepage, press Ctrl+Shift+x (Windows)/Command+Shift+x (Mac OS), or directly select the Extensions option in the left sidebar. Type C/C++ in the search bar, click and select the first item to install.
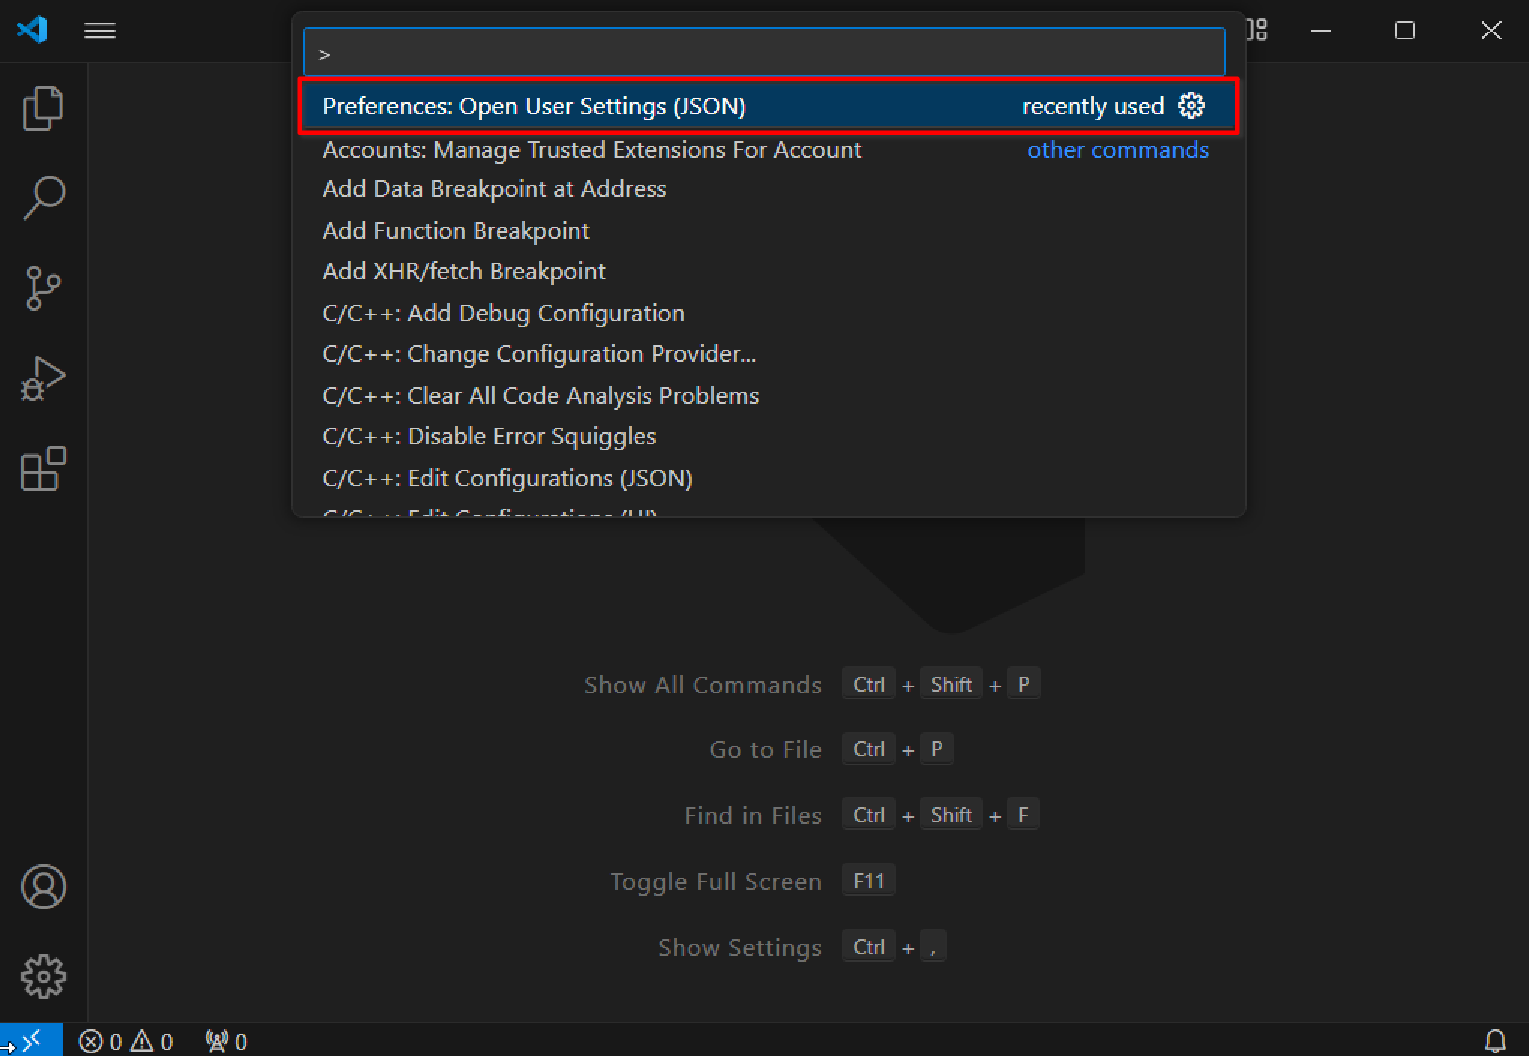
On the VS Code homepage, press Ctrl+Shift+p (Windows)/Command+Shift+p (Mac OS), in the pop-up chat box, type settings.json and select Preferences: Open User Settings (JSON) from the options that appear.
In the file that opens (assuming it doesn’t contain any other configuration information), type the following:
{
  "C_Cpp.default.compilerArgs": [
    "-Wall",
  ],
}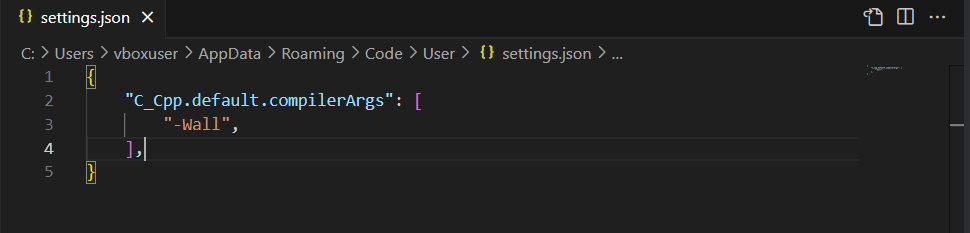
If the settings.json file you’ve opened isn’t blank, it means you already have some configuration information. Don’t delete the existing configuration info. Just add a comma after the existing configuration and then type "C_Cpp.default.compilerArgs": ["-Wall",].
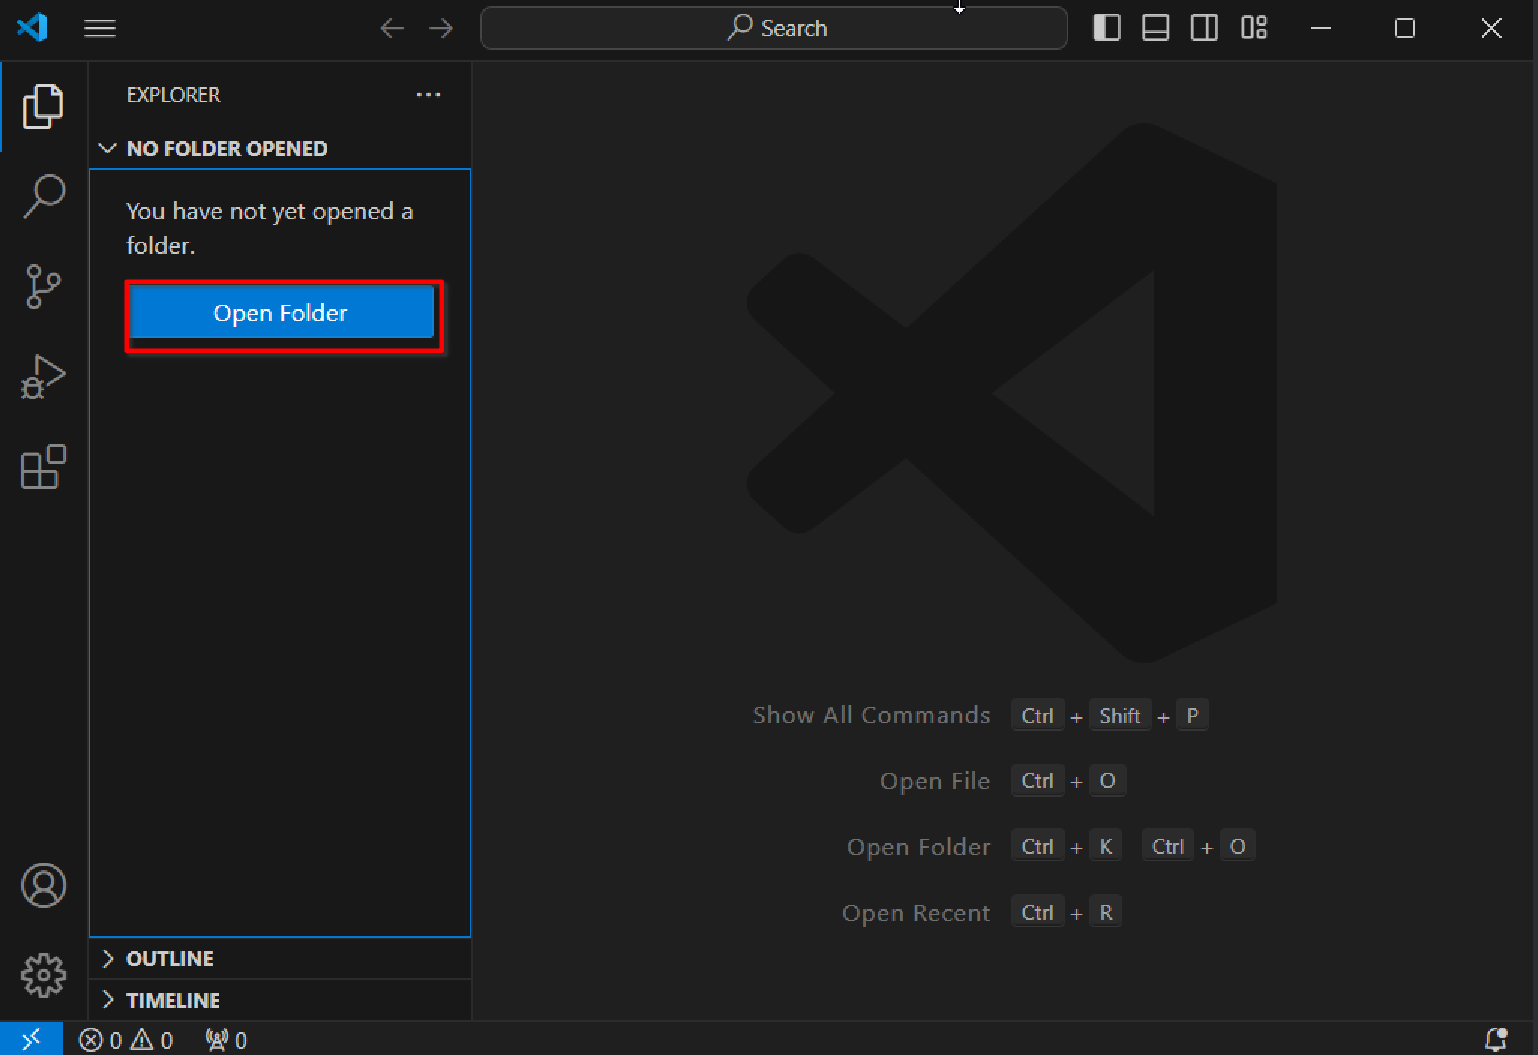
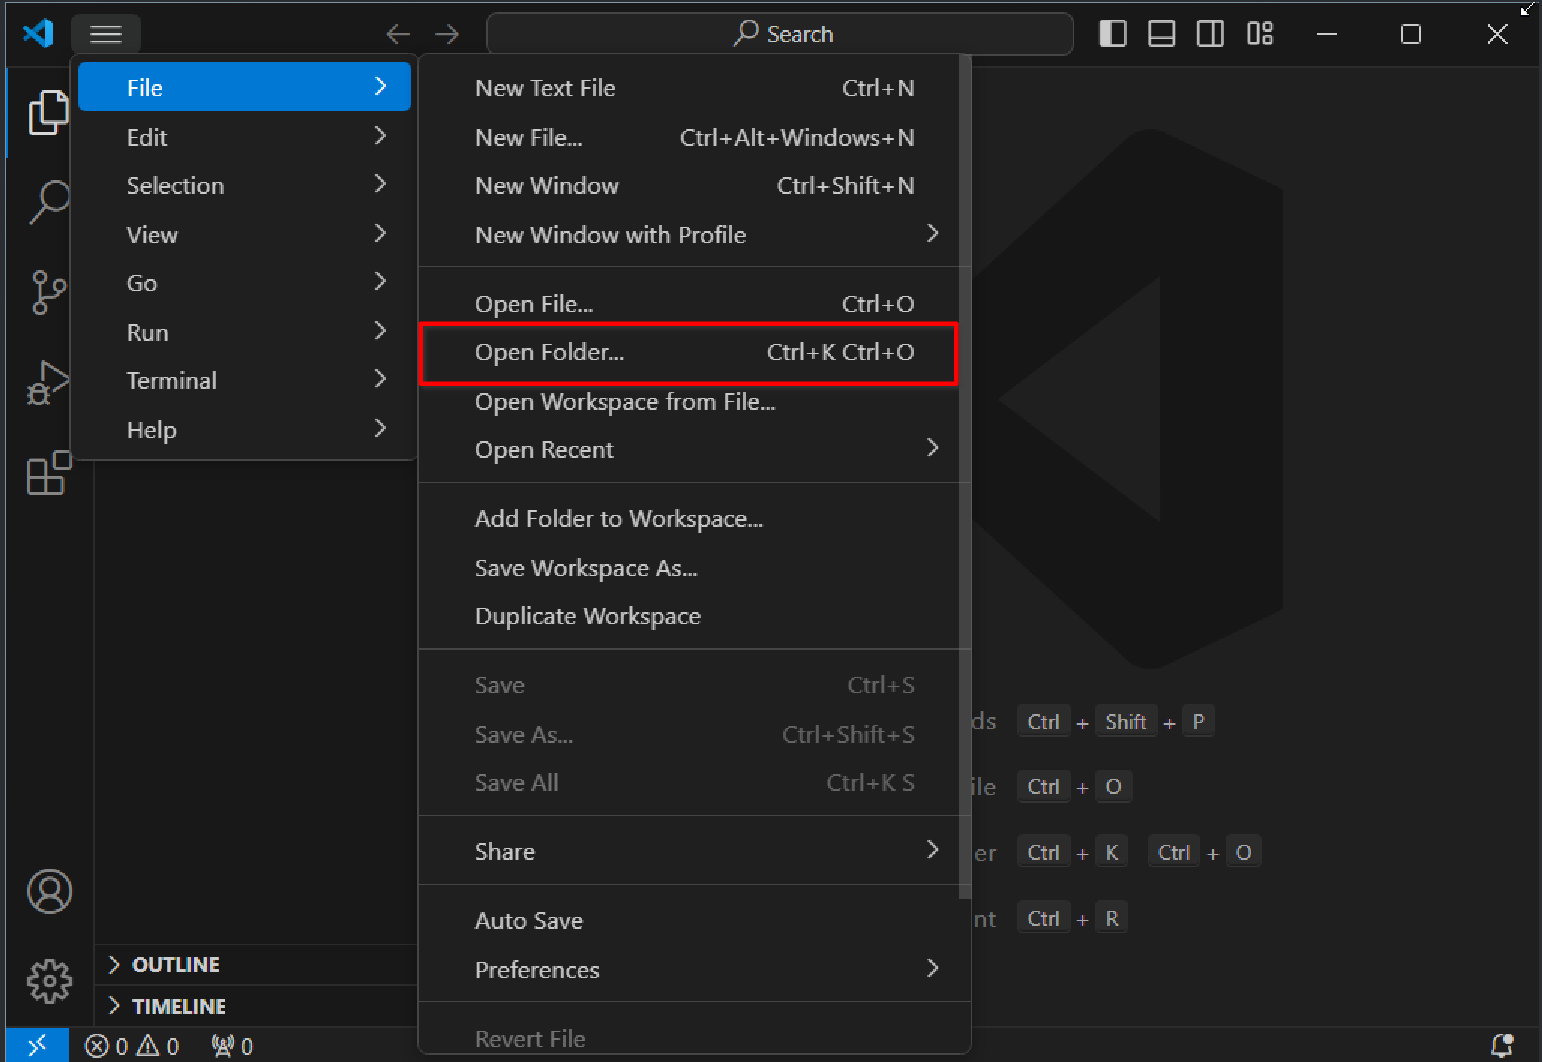
Create a new folder named helloworld in a suitable path. On the VS Code homepage, click Open Folder in the menu to find and click Open Folder/directly press Ctrl+K Ctrl+O, find and select helloworld to open.
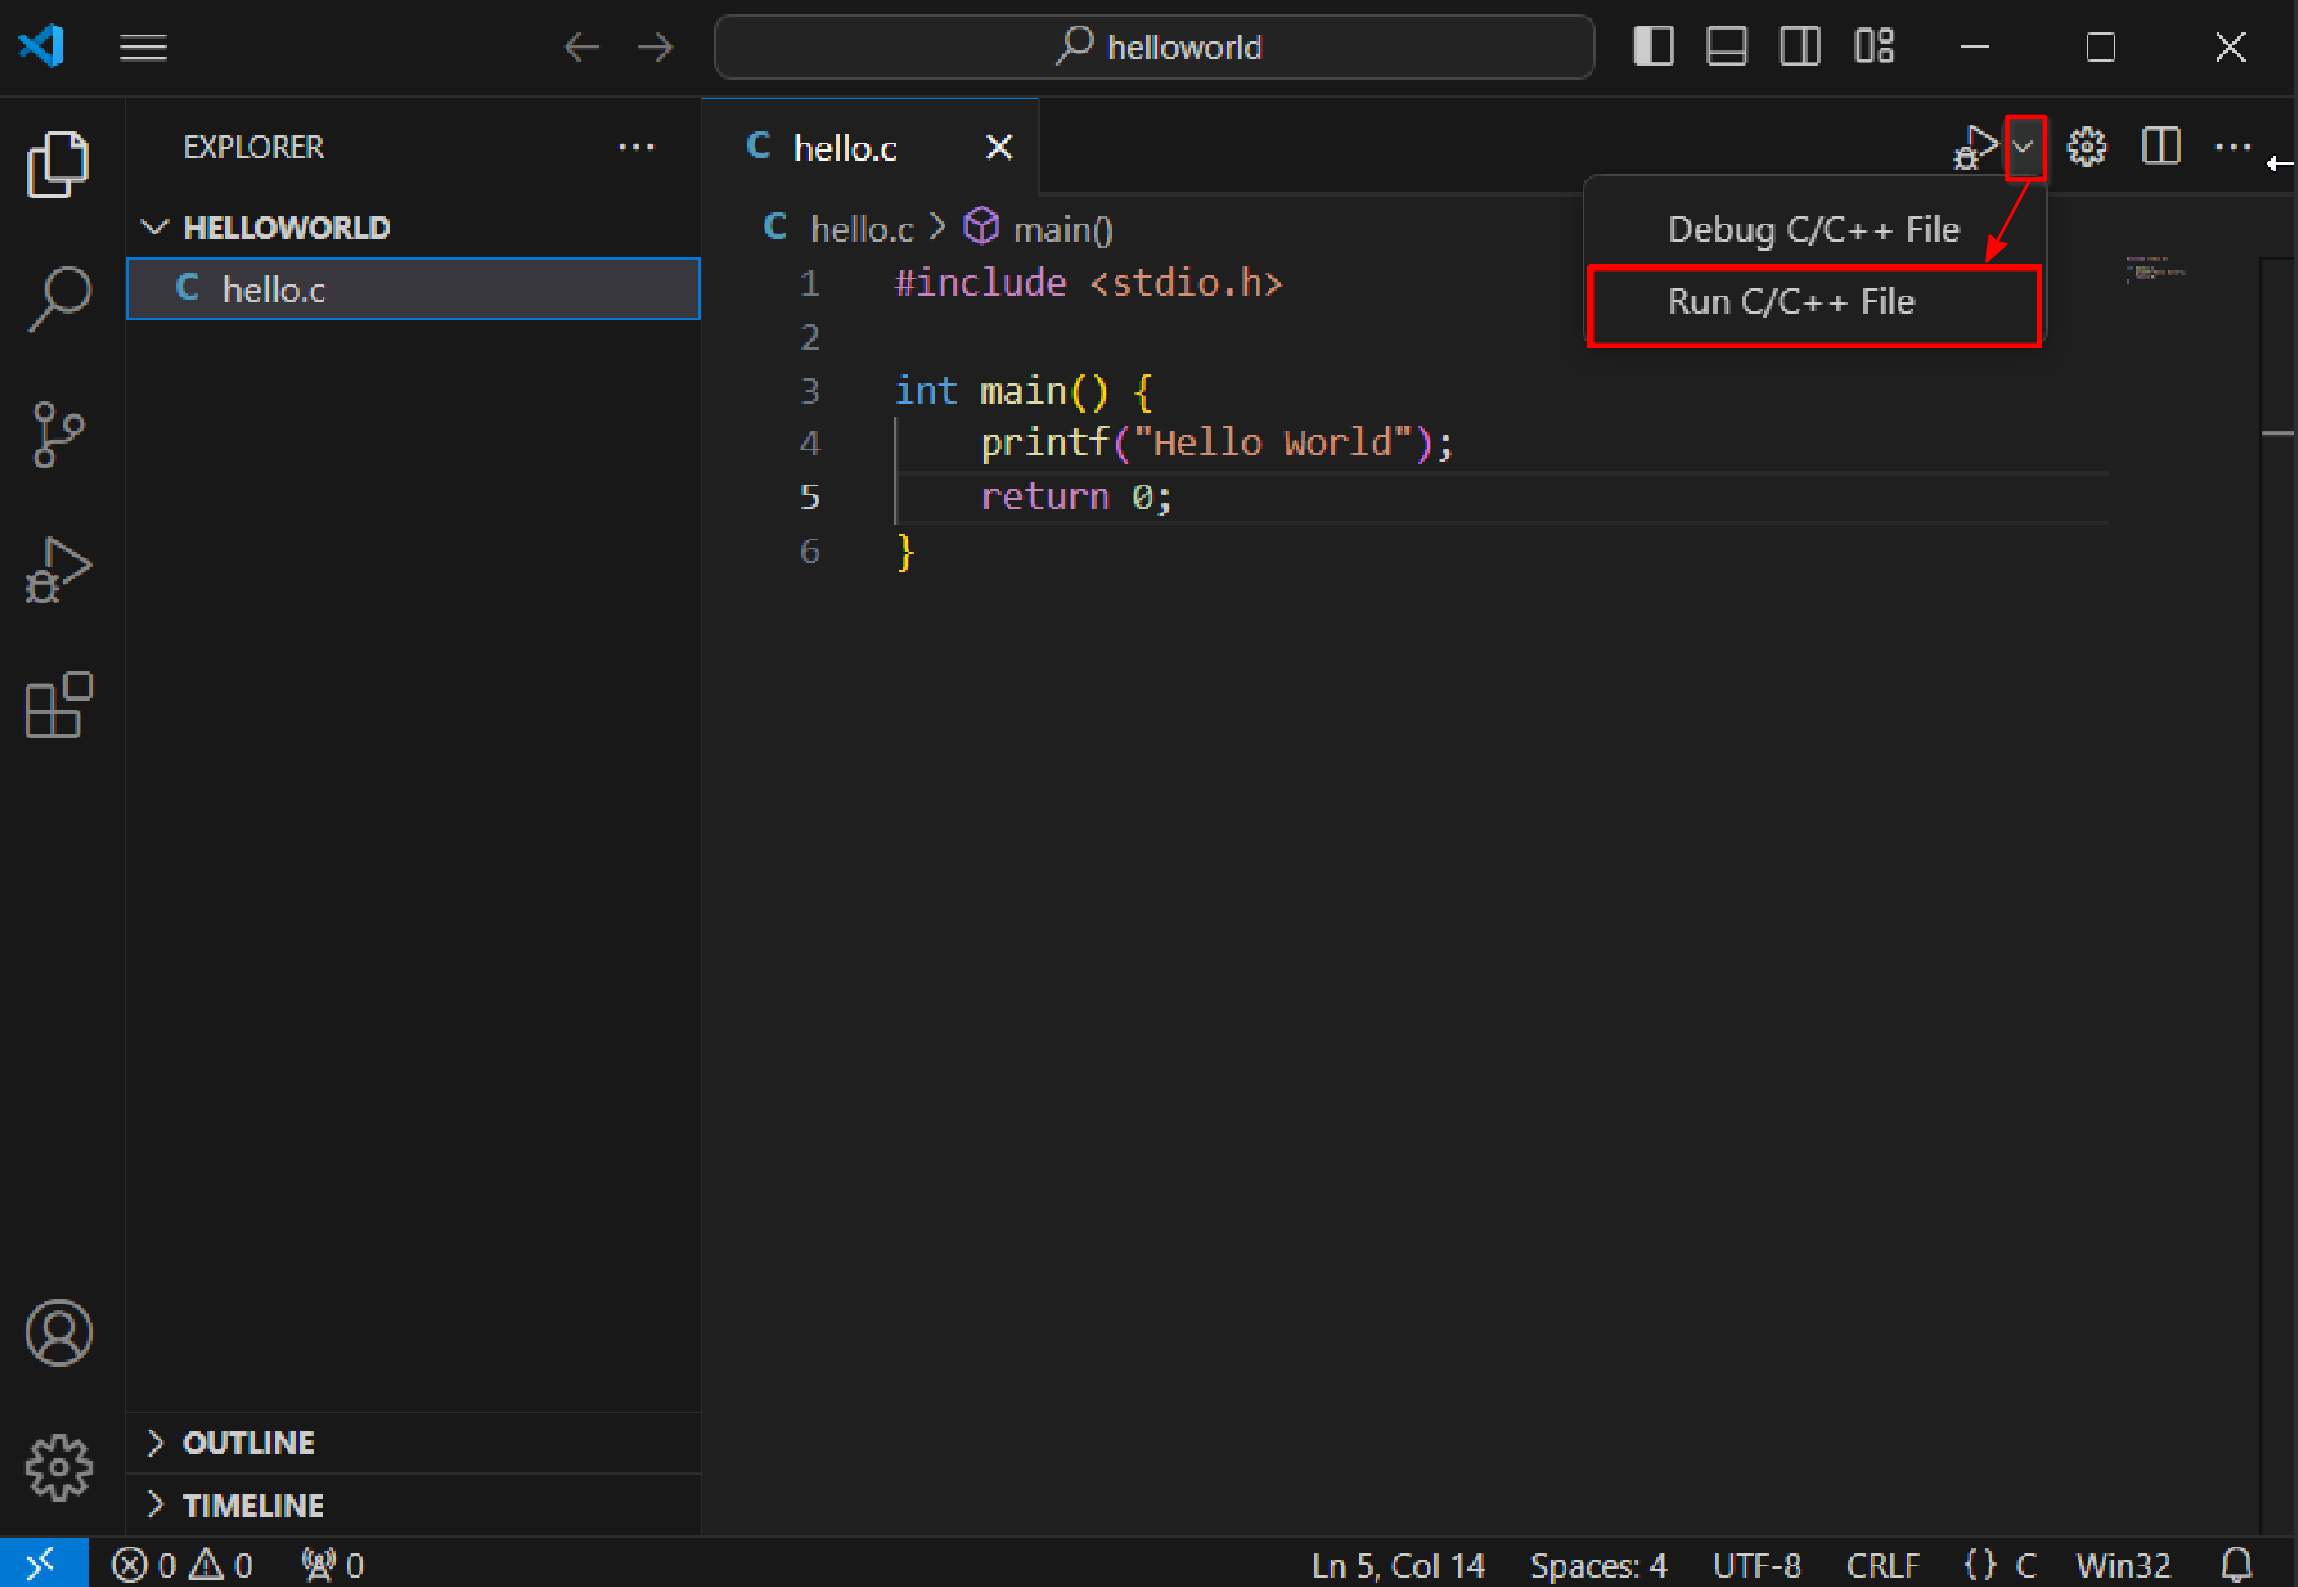
Create a new file, name it hello.c, copy or type the following code:
#include <stdio.h>

int main() {
    printf("Hello World!\n");
    return 0;
}
This code will output a sentence in the terminal: Hello World!; To output this sentence, we need to compile and run this program. Click the dropdown button next to the triangle play button in the upper right corner, and select Run C/C++ File from the menu
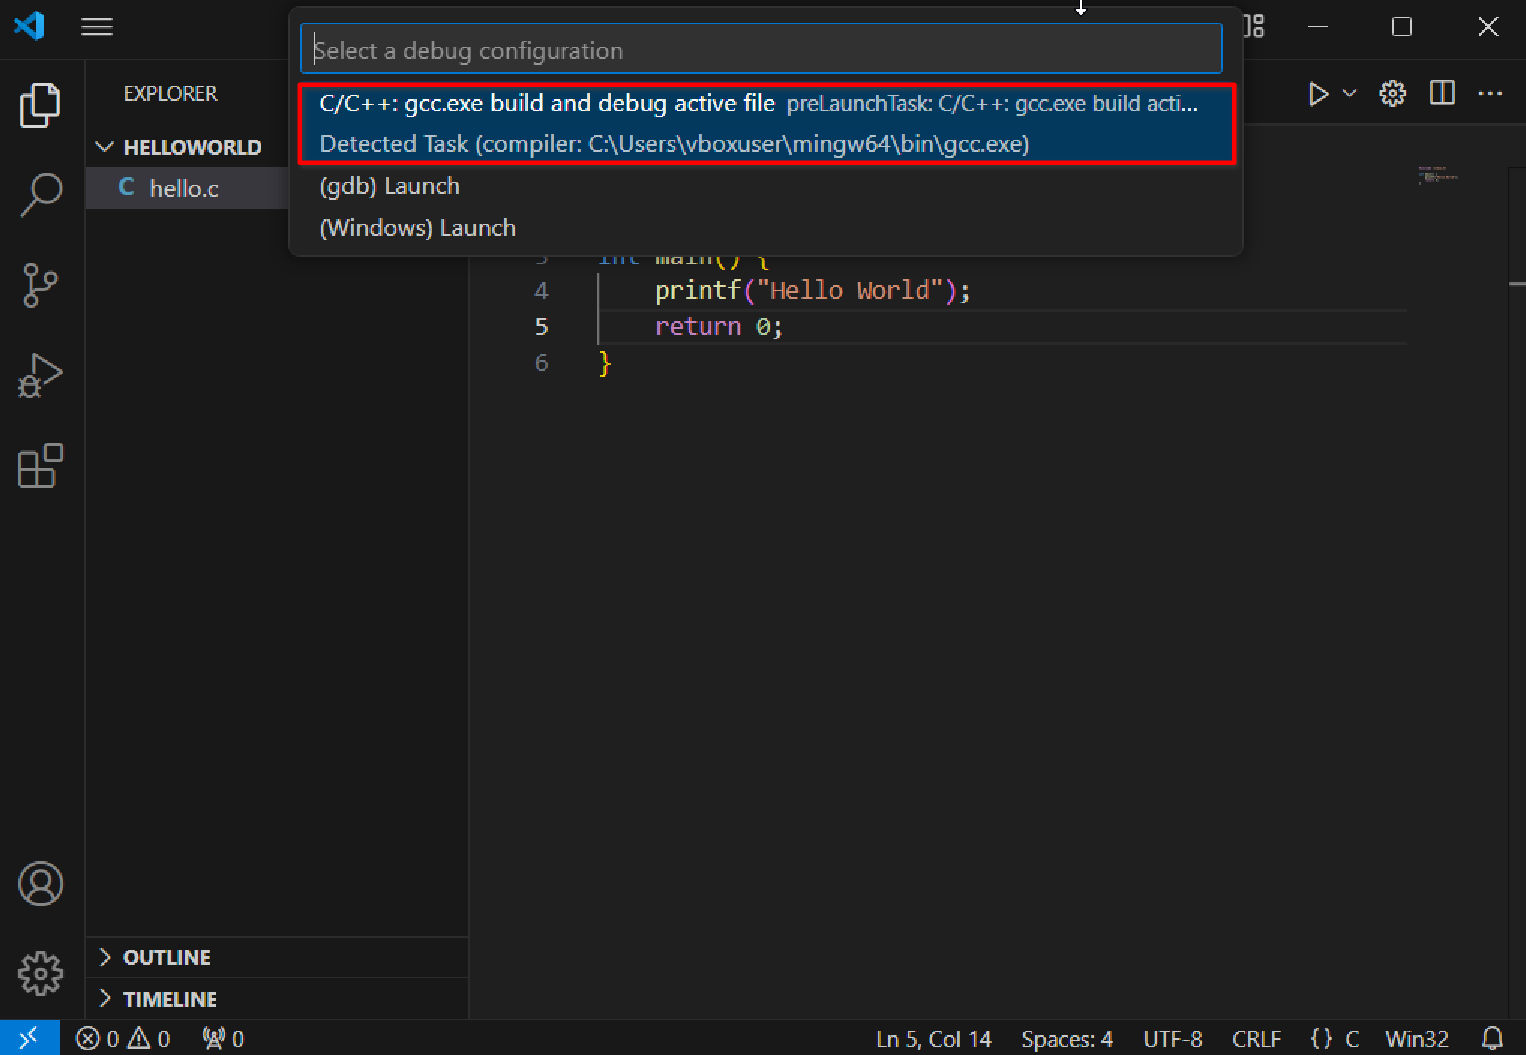
In the pop-up menu, select the option containing gcc.exe
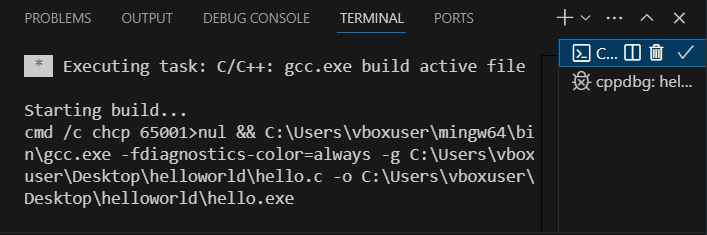
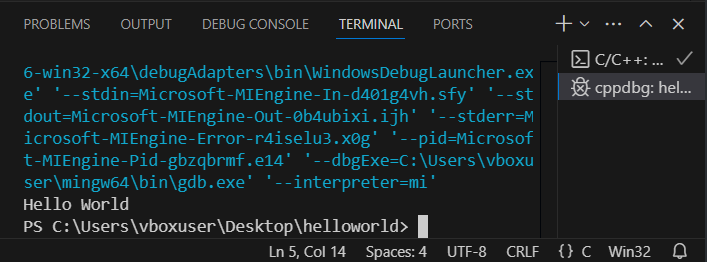
After a brief delay, two terminal windows will pop up at the bottom of VS Code; in the second window, you’ll see the expected Hello World! Congratulations, you’ve successfully run your first C language program!
You may notice that after performing the above operations, a folder called .vscode and a file called hello.exe (if you’re using Mac OS, the file might be called hello) appeared in the file explorer on the left; I’ll explain each one:
- .vscode: This is a special folder used to store all of VS Code’s configuration files in the current project. It contains an important file called
tasks.json. When you first click the “Run Program” button, VS Code automatically generates this file. The purpose oftasks.jsonis to record the task script corresponding to the “Run” button in VS Code, which defines how to compile and execute your program. - hello.exe: This is the binary executable file produced by this compilation.
After successfully running your first program, you might want to think about these questions:
- What happened behind the scenes when you clicked the run button? What did VS Code do? What did the compiler do? You can try to find the answers by reading
task.json. - As the number of code files increases, the generated executable files will pile up with the code files, which is very unsightly. Is there a way to optimize this? How should I organize the file structure of my programming project?
- If you just manually typed the code, you might have noticed some red wavy lines and error prompts appearing as you typed. Try typing again or deleting some random content, read these prompts, what are they for?
- To improve programming efficiency, what features does a code editor need?
Why do we need better tools?
As a teaching assistant, over the past two years of checking experiments, there have always been students questioning: Why can’t we use Dev-C++? Why do we need to go to the trouble of configuring VS Code? You might be thinking now, this is just a programming course, isn’t it enough that I learn to program? Why do I need to understand what the tools are doing? Why do I need to optimize my project structure and programming tools?
To answer this question, we can discuss from two aspects:
In the process of checking experiments, every year many students encounter various problems due to not understanding these tools, such as: forgetting to save files leading to repeated runs with results not matching expectations, not knowing how to read prompt information leading to difficulty in error correction, not understanding the script for running programs leading to compilation failures, nested project files leading to loss of homework code, and so on; as a result, experiments cannot be completed in class, causing loss of scores.
Learning to “use the right tools to do things” - the invention and use of computers is to provide services to users. For any needs you have in work and study, you can think, “Is there a tool to help me do this?” Starting from familiarizing yourself with the programming environment, I hope you can start thinking, proposing, and trying to solve your own needs.
VS Code is a very powerful tool. Besides basic program writing and running, error prompting, it also supports: changing fonts and themes, automatic program formatting, debugging and running code, AI code writing, and other functions. If you have more needs, you can search for relevant recommended articles on your own.